
Blog News
How to Choose the Best Dirt Jumper Forks for Your Bike
Feb
How to Choose the Best Dirt Jumper Forks for Your Bike
When choosing dirt jumper forks, prioritize 100mm of travel, a sturdy chromoly or aluminum steerer, and a 20mm thru-axle for maximum durability and control during aggressive park or street riding 1. For most riders, air-sprung coil-over forks offer the best balance of responsiveness and low maintenance. Avoid lightweight suspension forks designed for cross-country use—they lack the impact resistance needed for jumps and drops. Instead, look for models built specifically for BMX or hardtail jump bikes, ensuring compatibility with your frame’s head tube and wheel size (typically 26in or 29in). This guide covers everything from materials and fork types to key specs and red flags to avoid.
About Dirt Jumper Forks
Dirt jumper forks are specialized front suspension units designed for bicycles used in freestyle mountain biking, urban street tricks, and pump track sessions. Unlike standard mountain bike forks built for trail efficiency, dirt jumper forks must withstand repeated high-impact landings, handlebars spins, and curb grinds. These forks typically feature shorter travel—ranging from 80mm to 120mm—and are engineered for stiffness, strength, and responsive handling.
Most dirt jumper bikes use rigid frames with no rear suspension, placing greater demand on the front fork to absorb shock. As such, these forks are commonly found on hardtail frames with 26-inch, 27.5-inch, or 29-inch wheels, depending on the model and rider preference. They connect to the bike via a headset in the head tube and support the front wheel through either a quick-release skewer or, more commonly in modern setups, a 15mm or 20mm thru-axle system for improved rigidity and safety during aerial maneuvers.
Why Dirt Jumper Forks Are Gaining Popularity
 The rise in popularity of dirt jumping as both a competitive sport and recreational activity has driven increased demand for purpose-built components like dedicated dirt jumper forks. Urban cycling culture, the growth of bike parks, and the influence of social media showcasing extreme riding stunts have all contributed to the trend 2.
Riders are seeking gear that enhances performance while minimizing mechanical failure during risky tricks. Off-the-shelf mountain bike forks often fail under such stress due to insufficient damping or weak stanchions. Purpose-designed dirt jumper forks solve this by offering reinforced crowns, thicker stanchion tubes, and simplified internals that reduce maintenance needs without sacrificing function. Additionally, many younger riders transitioning from BMX appreciate the hybrid nature of dirt jumpers, which allows them to apply similar techniques at higher speeds and over larger features.
Types and Variants of Dirt Jumper Forks
 Understanding the different types of dirt jumper forks is essential when making a purchase decision. Each variant offers distinct advantages and trade-offs based on design, materials, and intended use.
Coil-Sprung Suspension Forks
These are the most common type used in dirt jumping. They utilize a metal spring (usually steel) inside the fork leg to provide resistance, combined with hydraulic damping to control rebound.
- Pros: Durable, consistent performance across temperatures, minimal tuning required, less prone to seal leaks than air springs.
- Cons: Heavier than air-sprung options, limited adjustability, may feel harsh on small bumps if not properly tuned.
Air-Sprung Suspension Forks
Used in some high-end models, these rely on compressed air as the primary spring mechanism, allowing precise sag adjustment and lighter overall weight.
- Pros: Lightweight, highly tunable, better small-bump sensitivity.
- Cons: More complex seals, require regular maintenance, sensitive to temperature changes, can be overkill for basic jump runs.
Rigid Forks (No Suspension)
Made entirely from steel or aluminum, these have zero travel and are favored by purists or those doing technical flatland-style tricks where feedback and predictability matter most.
- Pros: Extremely durable, lightweight, direct steering response, low cost.
- Cons: No shock absorption, leads to higher impact on joints and frame, unsuitable for large drops or rough terrain.
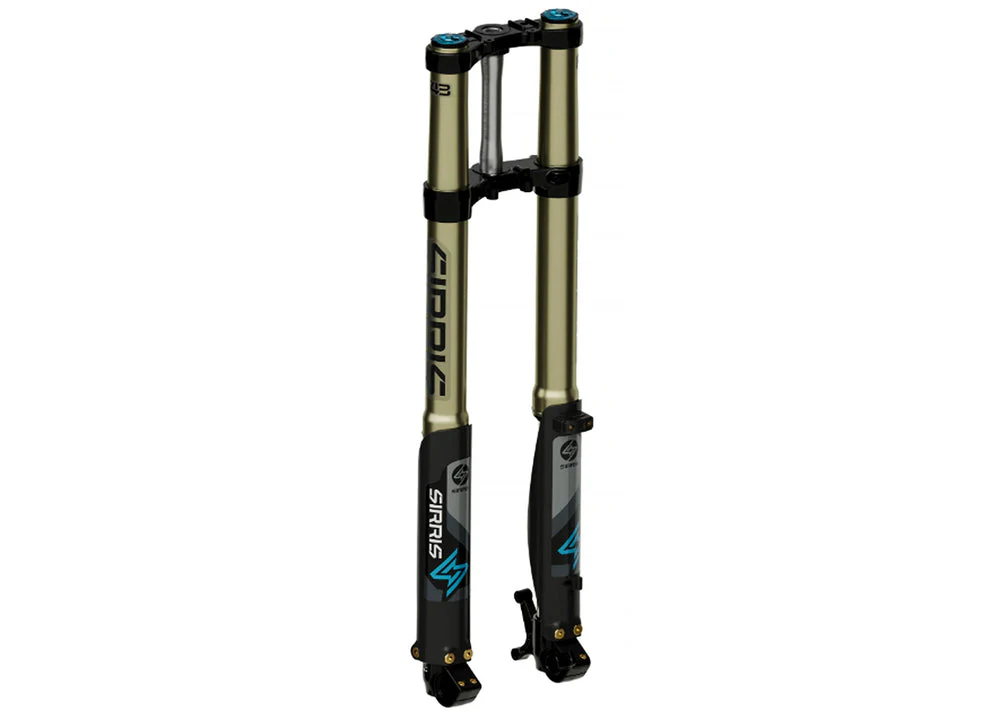
Inverted (Upside-Down) Forks
Also known as “USD” forks, these mount the larger stanchion tubes at the bottom, improving stiffness and reducing flex during landings.
- Pros: Increased torsional rigidity, better handling precision, improved aesthetics.
- Cons: Significantly heavier, more expensive, harder to service in field conditions.
Key Features and Specifications to Evaluate
 When evaluating how to choose dirt jumper forks, consider the following technical aspects to ensure compatibility and performance:
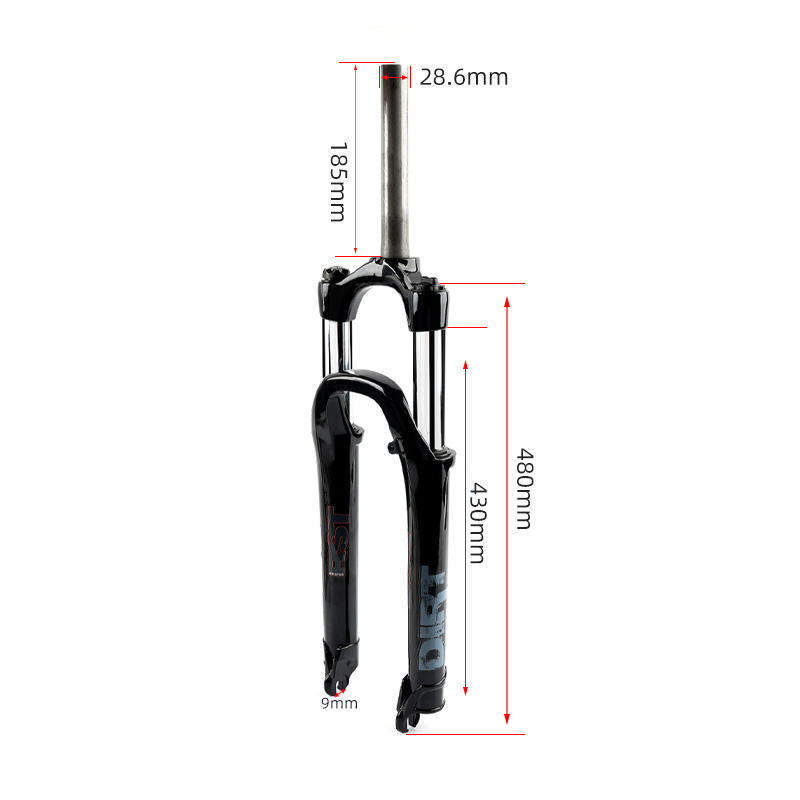
- Travel Length: Optimal range is 80–120mm. Less than 80mm reduces cushioning; more than 120mm adds unnecessary weight and alters head angle.
- Steerer Tube Diameter: Most modern forks use 1.1/8″ straight or tapered (1.1/8″ to 1.5″) steerers. Ensure match with your frame’s head tube.
- Axle Type: 20mm thru-axles are standard for strength and alignment accuracy. Older models may use 9mm QR skewers, which are less secure.
- Crown Design: Look for reinforced crowns with gusseting or internal reinforcement to resist cracking after hard impacts.
- Offset/Fork Rake: Affects steering geometry. Typical offset ranges from 45mm to 51mm—lower values increase stability at speed, higher values improve maneuverability.
- Weight: Average suspension forks weigh between 2.5kg and 3.5kg. Lighter isn’t always better if it compromises durability.
- Damping Adjustability: Rebound adjustment is useful; lockout levers are generally unnecessary and add complexity.
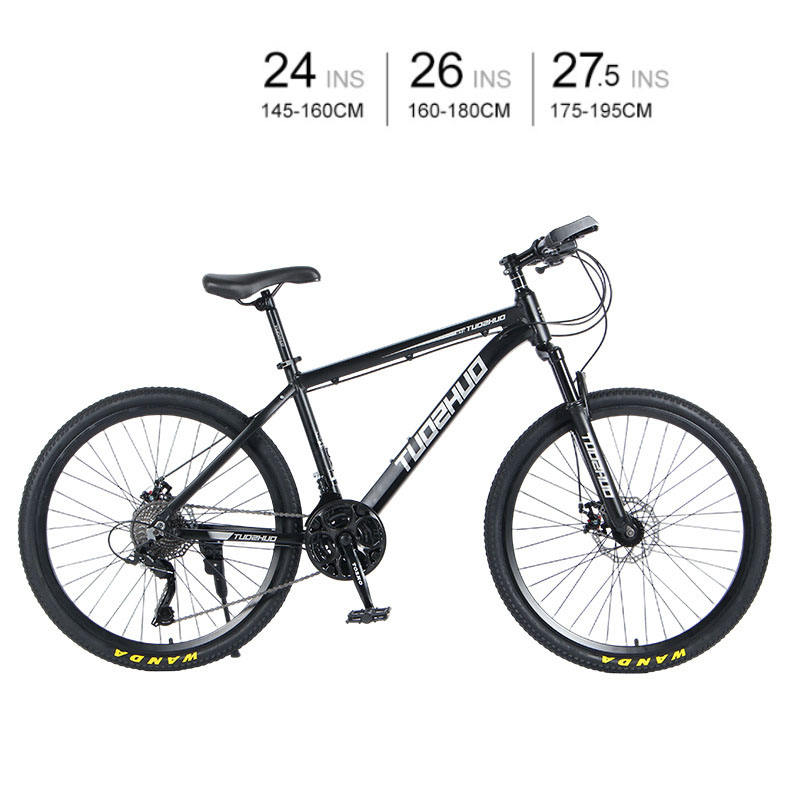
- Wheel Size Compatibility: Confirm whether the fork supports 26″, 27.5″, or 29″ wheels—some models are optimized for one size only.
Pros and Cons of Using Dedicated Dirt Jumper Forks
 Dedicated dirt jumper forks offer significant benefits but aren’t ideal for every rider or riding style.
Advantages:
- Built to survive repeated hard landings
- Improved traction and control upon touchdown
- Enhanced confidence when attempting new tricks
- Better energy return compared to rigid setups
Disadvantages:
- Higher initial cost than generic MTB forks
- Require periodic servicing (seal replacement, oil changes)
- Add weight to the front end, affecting balance
- Potential for air spring burping or coil bottom-out if improperly set up
They are best suited for intermediate to advanced riders who frequently ride at bike parks, build jumps, or perform aerial tricks. Casual commuters or trail riders should consider simpler, lighter forks instead.
How to Choose Dirt Jumper Forks: A Step-by-Step Guide
 Selecting the right fork involves matching your bike, riding style, and budget. Follow this checklist:
- Check Frame Compatibility: Verify head tube size (e.g., 1.1/8″) and fork crown race dimensions. Measure existing fork or consult manufacturer specs.
- Determine Travel Needs: 100mm is ideal for most jump lines. Use 80mm for street-focused builds, 120mm for downhill-style drops.
- Choose Axle Standard: Prefer 20mm thru-axle for security. If upgrading, ensure dropout compatibility.
- Select Material & Build Quality: Chromoly steerer tubes and alloy lowers offer good strength-to-weight ratio. Avoid carbon blades unless rated for stunt use.
- Evaluate Damping System: Coil springs are preferred for reliability. Air springs are acceptable if you maintain them regularly.
- Set a Realistic Budget: Entry-level quality starts around $150; premium models reach $400+. Avoid unknown brands promising high specs at low prices.
- Avoid Red Flags: Missing service manuals, non-serviceable designs, vague warranty terms, or absence of independent reviews.
Price & Market Insights
 The market for dirt jumper forks spans several tiers:
- Budget ($100–$180): Basic coil-sprung forks with 100mm travel, 1.1/8″ steerer, and 20mm axle. Suitable for beginners. Brands include SR Suntour and RST.
- Mid-Range ($180–$300): Better damping, sealed cartridge systems, reinforced crowns. Examples: Marzocchi DJ series, RockShox Recon DJ.
- Premium ($300+): High-end materials, inverted designs, extensive adjustability. Found on pro-level builds (e.g., Öhlins or custom USD forks).
Value-for-money sweet spot lies in the $200–$250 range, where you get reliable performance without excessive weight. Watch for discontinued models being sold at discounts—some older Marzocchi offerings remain excellent choices.
| Fork Model | Travel | Axle Type | Weight | Price Range |
|---|---|---|---|---|
| SR Suntour Raidon DJ | 100mm | 20mm Thru | 2.7kg | $160–$200 |
| RockShox Recon Silver DJ | 100mm | 20mm Thru | 2.9kg | $220–$260 |
| Marzocchi Bomber Z2 | 120mm | 20mm Thru | 3.1kg | $300–$350 |
Customer Feedback Synthesis
Analyzing real-world user experiences reveals consistent patterns in satisfaction and frustration.
Common Praises:
- “Handles big drops without bottoming out”
- “Stiffness makes landing switch-ups predictable”
- “Easy to set up with no tools needed for preload adjustment”
Recurring Complaints:
- “Cheaper models develop stiction after six months”
- “Rebound dial stopped working after a single crash”
- “Too heavy for my lightweight jump bike”
Reliability over time emerges as the top concern. Users value simplicity and serviceability—forks requiring frequent rebuilds or proprietary tools receive lower ratings. Positive feedback often highlights smooth action and confidence-inspiring damping.
Sourcing & Supplier Tips
Buy from reputable online retailers (e.g., Chain Reaction Cycles, Jenson USA, Merlin Cycles) or specialty BMX/Mountain shops that carry stunt-rated components. When sourcing internationally, verify import duties and return policies before purchase.
For bulk buyers or resellers, contact distributors directly for dealer pricing. Always request batch numbers and authenticity verification, especially with high-demand discontinued models. Inspect forks upon arrival for shipping damage, particularly dented stanchions or bent lowers.
If buying used, check for:
- Scratches or pitting on stanchion tubes
- Smooth operation when compressing by hand
- Presence of original seals and dust wipers
- Full range of rebound adjustment functionality
Maintenance, Safety & Legal Considerations
Regular maintenance ensures longevity and safety. Service intervals depend on usage:
- Every 50 hours of riding: Wipe stanchions, inspect for scratches, check axle tightness.
- Every 100–150 hours: Replace damping oil and foam rings (coil forks), or service air springs and seals (air forks).
Use only manufacturer-recommended lubricants. Damaged or leaking forks should be repaired immediately—continued use risks sudden collapse during a jump.
No specific legal regulations govern dirt jumper forks in most countries, but public park rules may restrict modified bikes or prohibit stunts in certain areas. Always wear protective gear and follow local ordinances regarding bike modifications and riding zones.
Conclusion
Choosing the best dirt jumper forks requires balancing durability, compatibility, and performance. Prioritize 100mm travel, a 20mm thru-axle, and a proven coil-sprung design for most aggressive riding scenarios. While air-sprung and inverted models offer performance gains, they come with added complexity and cost. Stick to trusted brands and avoid overly cheap alternatives that compromise on safety. By focusing on core specifications and real-world reliability, you’ll find a fork that enhances your riding experience and withstands the demands of dirt jumping.
FAQs
What travel length is best for dirt jumper forks?
100mm is optimal for most riders, providing enough cushion for landings without adding excess weight or altering bike geometry.
Can I use a regular MTB fork for dirt jumping?
Standard trail or XC forks lack the impact resistance and damping control needed. Use only forks labeled for DJ or freeride use.
Are air-sprung forks better than coil for dirt jumping?
Not necessarily. Coil forks are more durable and consistent under heavy loads, making them preferable for most jump applications.
How often should I service my dirt jumper fork?
Every 100–150 hours of riding, or annually with moderate use. Clean stanchions monthly and check for leaks after crashes.
Do I need an inverted fork for dirt jumping?
Inverted forks offer stiffness but add weight and cost. They’re beneficial for advanced riders doing large gaps, but not essential for casual park use.